Regular price $29 You save $10 — launch price
A Beginner’s Guide To DIY Repairs & Home Improvements
Stop paying for pricey repairs. This Guide To DIY Repairs - from tools you need, techniques that work, everything to handle home fixes yourself. You don't need to be a handyman.
7/2/20264 min read
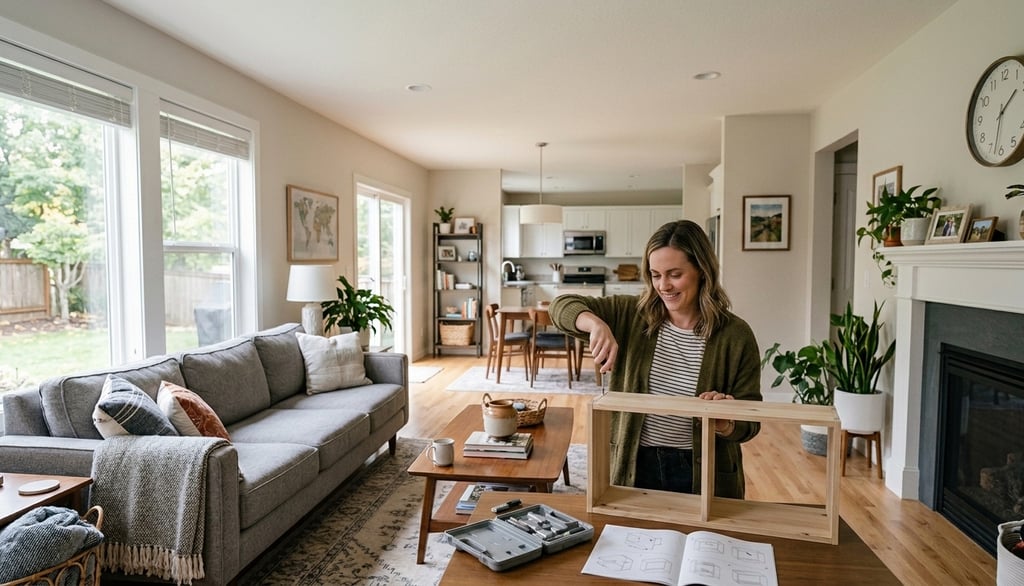
A Beginner’s Guide To DIY Repairs & Home Improvements
Stepping into the world of DIY repairs and home improvements can feel exciting and intimidating at the same time. Maybe you’re tired of waiting for the landlord to fix that leaky tap, or you want your space to finally reflect your style instead of the previous tenant’s. Either way, learning a few basics will save you money, build your confidence, and make your home feel truly yours.
Below is a beginner-friendly guide that walks you through the four big questions every DIYer should ask before grabbing a hammer or calling a pro.
What Tools Do You Really Need?
Before you think about accent walls or new shelving, start with a simple, reliable toolkit. You don’t need every gadget in the hardware aisle, but you do need a few essentials that can handle most DIY repairs and home improvements.
Core tools to start with:
Interchangeable screwdriver with flathead
Adjustable wrench
Tape measure
Pliers
Claw hammer
Strong glue and/or duct tape
Level
These cover everyday jobs like tightening loose handles, hanging pictures, assembling furniture, and making sure shelves don’t sit crooked.
Once you’ve got the basics, add a few “power tools” and helpers to make life easier:
Cordless drill (for drilling holes and driving screws fast)
Stud finder (so you don’t guess where to hang heavy items)
Step ladder (for safe access to ceilings and high shelves)
Utility knife (for cutting packaging, drywall, carpet, and more)
Hand saw or hacksaw (a good starting point for small cutting jobs)
If you’re getting into décor and curb appeal, tools like paint trays, rollers, painter’s tape, a good vacuum or carpet cleaner, mop, and even basic gardening tools can go a long way.
A smart beginner move is to:
Invest in quality for tools you’ll use often.
Borrow or rent specialized tools you’ll only use once in a while.
This way, your toolkit grows with your skills instead of draining your budget upfront.
What Skills Do You Have (And Which Should You Skip)?
Good DIY isn’t about doing everything yourself; it’s about knowing what you can safely and confidently handle. Your natural strengths and comfort level should guide the projects you take on.
For most beginners, these are realistic DIY repairs and home improvements to learn first:
Patching small holes in drywall
Painting walls or cabinets
Finding studs and hanging shelves
Changing locks and door handles
Fixing window screens
Basic plumbing tasks, like unclogging a toilet or stopping a small leak
These skills are low-risk, highly useful, and great confidence builders. You’ll quickly see the impact in your space without putting yourself or your home in danger.
On the flip side, some projects are better left to licensed professionals:
Plumbing that touches main water lines or complex systems
Gas lines and anything connected to them
Electrical wiring, panel work, and major lighting changes
HVAC repairs or installations
These jobs often need permits, certifications, or inspections, and they carry real safety risks if something goes wrong.
As you learn, lean on tutorials and trusted resources, but don’t just follow a video step-by-step without reading ahead. Understanding the full process before you start keeps you from getting stuck halfway through.
What Is Your Budget For DIY?
DIY can be cheaper than hiring help, but it’s not “free.” Tools, materials, and even your time all have a cost, so budgeting is part of smart home improvement.
One helpful way to think about projects is to group them by price ranges:
Under $50: Simple jobs you can usually start quickly
$50–$150: Medium projects that need an itemized budget
$150 and up: Bigger jobs where you should compare DIY costs to hiring a pro
When you plan your budget, include:
Tools you need to buy or rent
Hardware like nails, screws, brackets
Paint, lumber, fixtures, or other materials
Extra supplies for mistakes or do-overs
Don’t forget to factor in the time it takes to learn and do the work. Your hours have value, and sometimes paying a pro is actually the “cheaper” option if a job would take you a full weekend and a lot of stress.
The goal isn’t to be ultra-frugal; it’s to be realistic. DIY always involves a bit of trial and error, so build wiggle room into every project budget.
How Much Time Do You Have To Work On It?
Time is the hidden cost in most DIY repairs and home improvements. A project that looks “easy” in a 30-second reel can take several hours in real life, especially if it’s your first time.
Before you start:
Block out more time than you think you’ll need.
Avoid starting big jobs late at night.
Break projects into clear steps so you can pause and resume.
Going slow and steady usually beats rushing. Watch tutorials, pause to check each step in your own space, and give yourself room for mistakes and fixes.
It can also help to start important projects on weekdays rather than weekends. If something goes wrong with plumbing or electrical, you’re less likely to pay emergency call-out rates to get it fixed.
Over time, you’ll notice that tasks that once took you all afternoon become quick home maintenance routines. That’s the real win with DIY: your skills grow, your home looks and works better, and you feel more at ease tackling the next project.
To make this beginner’s guide to DIY repairs and home improvements truly work for you, the next step is personal: decide which small project you’re ready to try first and why it makes sense for your current budget, skills, and time. What’s one DIY task in your home you’d like to start with, and what do you already feel confident enough to handle on it?
The Homeowner's Manual
Your home didn't come with an owner's manual. We built one.
© 2026 The Homeowner's Manual-Protecting residential value, one seasonal checklist at a time.
PREVENTATIVE UPKEEP